Topwo博客
首页
博客
项目
您现在的位置是:
Topwo博客
>>
其他
文章
PVE添加CPU温度显示
发布时间:2024-10-27
作者:Topwo
来源:原创
点击:1108
## 1. 先进入pve的shell,安装 lm-sensors ```shell apt-get install lm-sensors ``` 无法安装的话先更新一下源 ```shell apt-get update ``` 安装完成后,可以运行下面的命令,来探测哪些传感器可用并加载相关的内核模块。 ```shell sensors-detect ``` ```shell sensors ``` 执行上面的命令,即可显示出系统运行的温度状态,下面是 3205U 的显示结果示例(Core 0和Core 1表示有两个CPU核心): ```shell root@www:~# sensors coretemp-isa-0000 Adapter: ISA adapter Package id 0: +25.0°C (high = +82.0°C, crit = +100.0°C) Core 0: +22.0°C (high = +82.0°C, crit = +100.0°C) Core 1: +23.0°C (high = +82.0°C, crit = +100.0°C) Core 2: +23.0°C (high = +82.0°C, crit = +100.0°C) Core 3: +25.0°C (high = +82.0°C, crit = +100.0°C) Core 4: +24.0°C (high = +82.0°C, crit = +100.0°C) Core 5: +24.0°C (high = +82.0°C, crit = +100.0°C) adt7473-i2c-3-2e Adapter: nvkm-0000:06:00.0-bus-0002 in1: +3.00 V (min = +0.00 V, max = +2.99 V) +3.3V: +3.35 V (min = +0.00 V, max = +4.39 V) fan1: 3089 RPM (min = 0 RPM) fan2: 0 RPM (min = 0 RPM) fan3: 0 RPM (min = 0 RPM) temp1: +45.5°C (low = +70.0°C, high = +110.0°C) ALARM (crit = +115.0°C, hyst = +113.0°C) Board Temp: +41.5°C (low = -63.0°C, high = +191.0°C) (crit = +100.0°C, hyst = +96.0°C) temp3: +45.8°C (low = -63.0°C, high = +191.0°C) (crit = +115.0°C, hyst = +111.0°C) nouveau-pci-0600 Adapter: PCI adapter GPU core: +1.00 V (min = +1.00 V, max = +1.10 V) fan1: 0 RPM temp1: +57.0°C (high = +95.0°C, hyst = +3.0°C) (crit = +100.0°C, hyst = +2.0°C) (emerg = +135.0°C, hyst = +5.0°C) ``` ## 2. 在网页上显示出来 先备份之后要修改的两个文件 ```shell cp /usr/share/perl5/PVE/API2/Nodes.pm /usr/share/perl5/PVE/API2/Nodes.pm.bak cp /usr/share/pve-manager/js/pvemanagerlib.js /usr/share/pve-manager/js/pvemanagerlib.js.bak vi /usr/share/perl5/PVE/API2/Nodes.pm ``` 搜`pveversion`,修改文件内容,添加``$res->{thermalstate} = `sensors`;`` 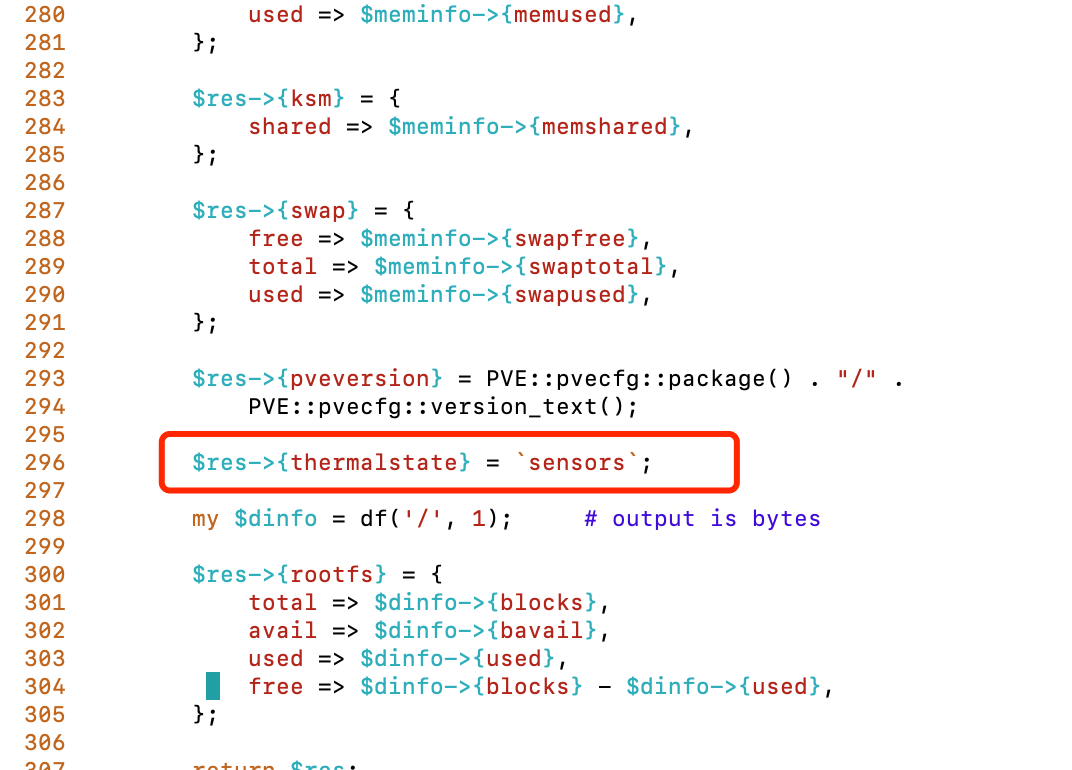 之后修改页面布局,增加界面高度让新的CPU内容有地方显示 ```shell vi /usr/share/pve-manager/js/pvemanagerlib.js ``` 修改以下两处地方: 第1处搜`Ext.window.Window`,修改 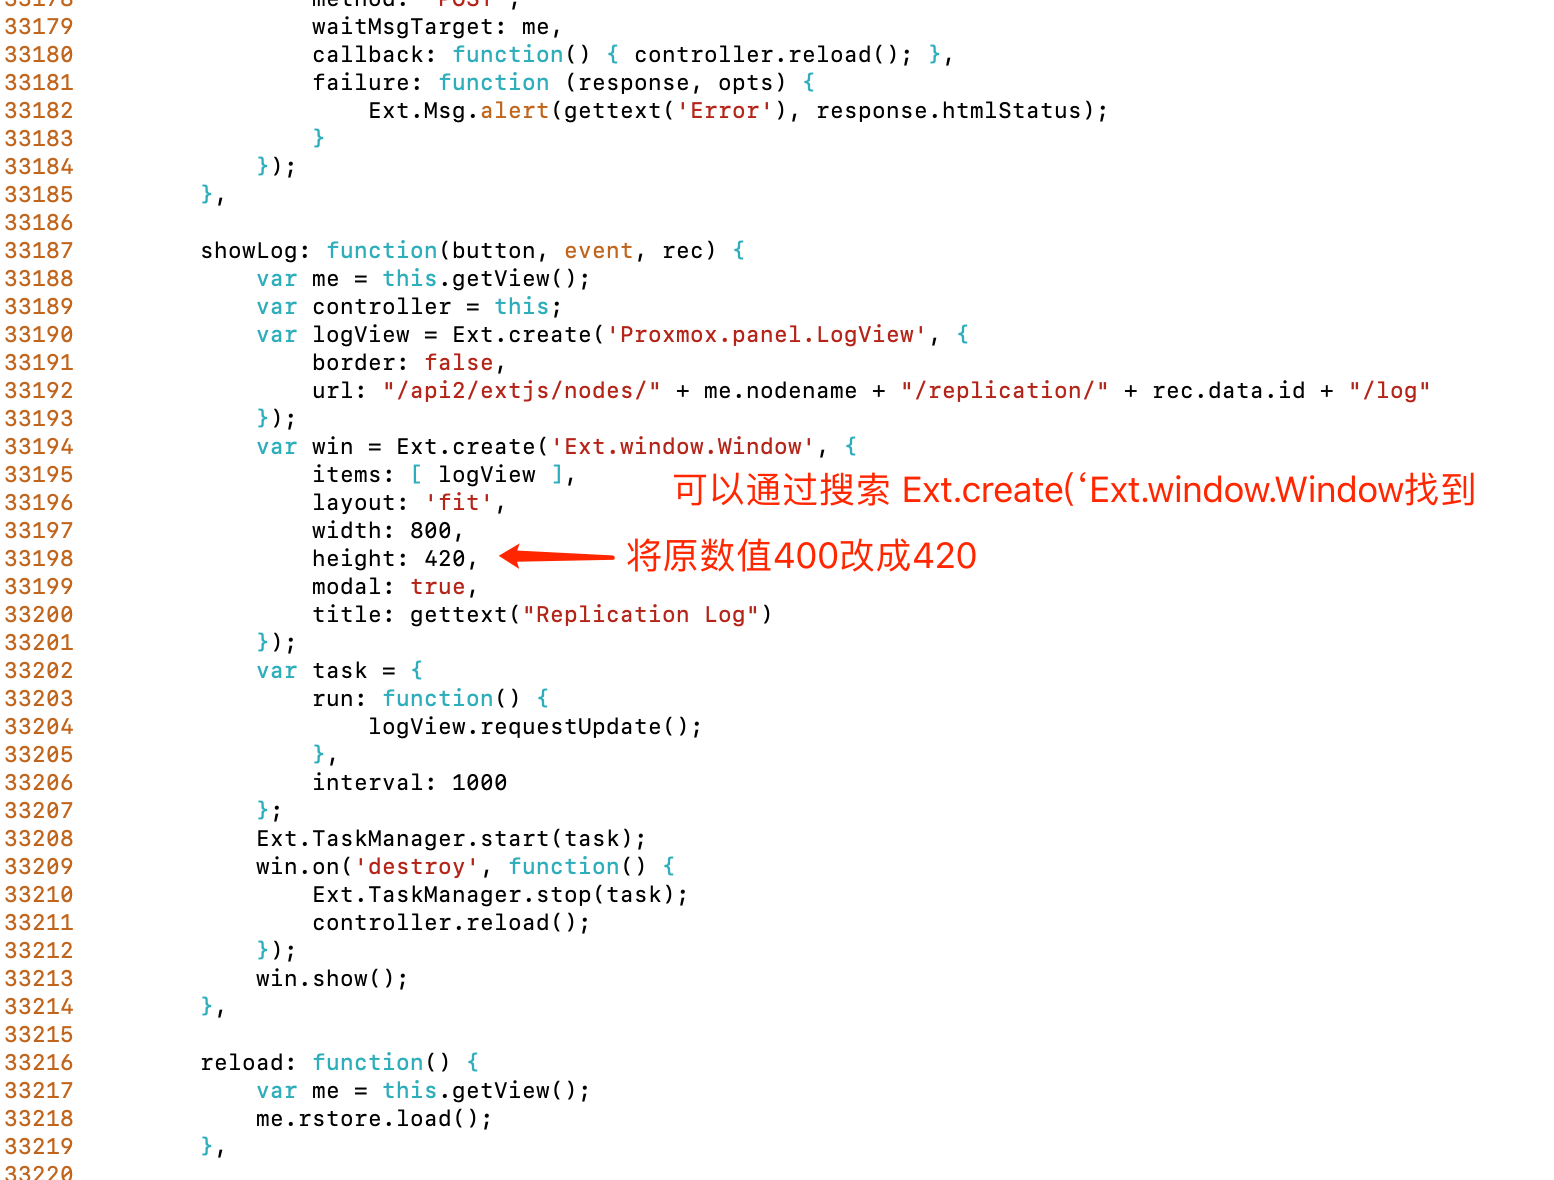 第2处搜`widget.pveNodeStatus`,修改 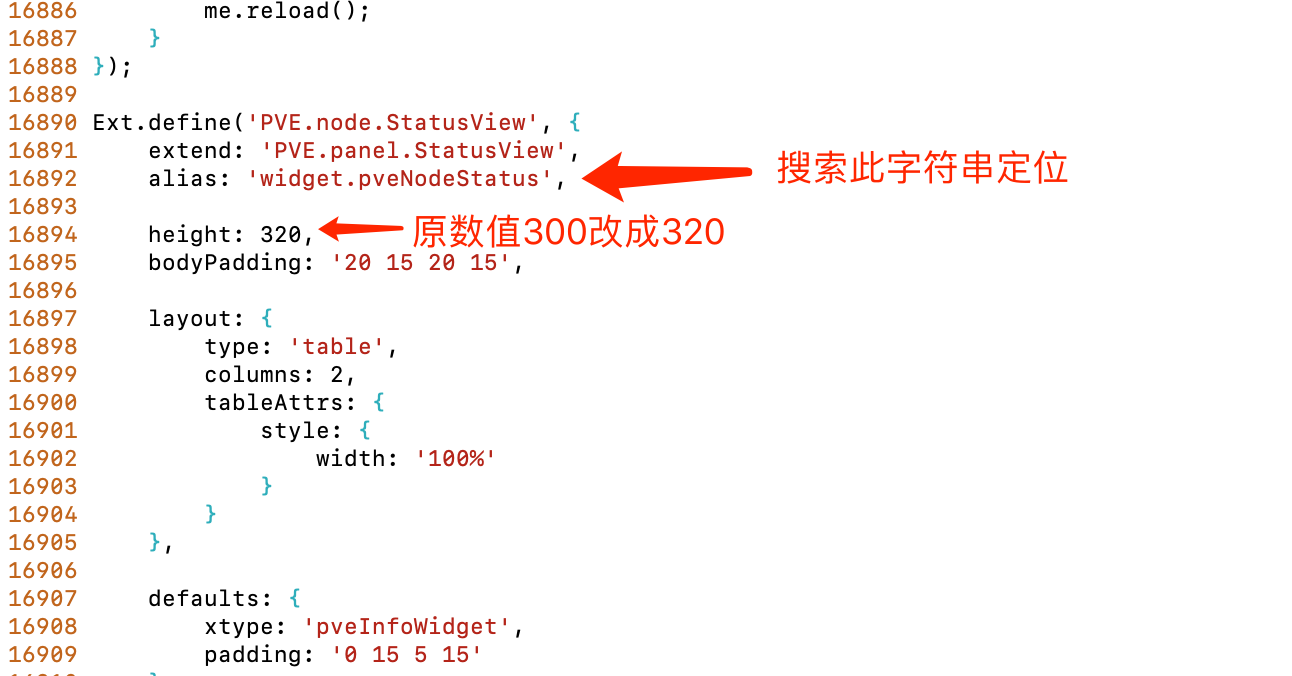 最后增加显示CPU温度的代码,显示的数据根据自己的电脑来 ```javascript { itemId: 'thermal', colspan: 2, printBar: false, title: gettext('CPU温度'), textField: 'thermalstate', renderer: function(value) { const p0 = value.match(/Package id 0.*?\+([\d\.]+)?/)[1]; const b0 = value.match(/Board Temp.*?\+([\d\.]+)?/)[1]; const c0 = value.match(/Core 0.*?\+([\d\.]+)?/)[1]; const c1 = value.match(/Core 1.*?\+([\d\.]+)?/)[1]; const c2 = value.match(/Core 2.*?\+([\d\.]+)?/)[1]; const c3 = value.match(/Core 3.*?\+([\d\.]+)?/)[1]; const c4 = value.match(/Core 4.*?\+([\d\.]+)?/)[1]; const c5 = value.match(/Core 5.*?\+([\d\.]+)?/)[1]; return `Package: ${p0} | Core: ${c0} | ${c1} | ${c2} | ${c3} | ${c4} | ${c5} | Board: ${b0} `; }, } ``` 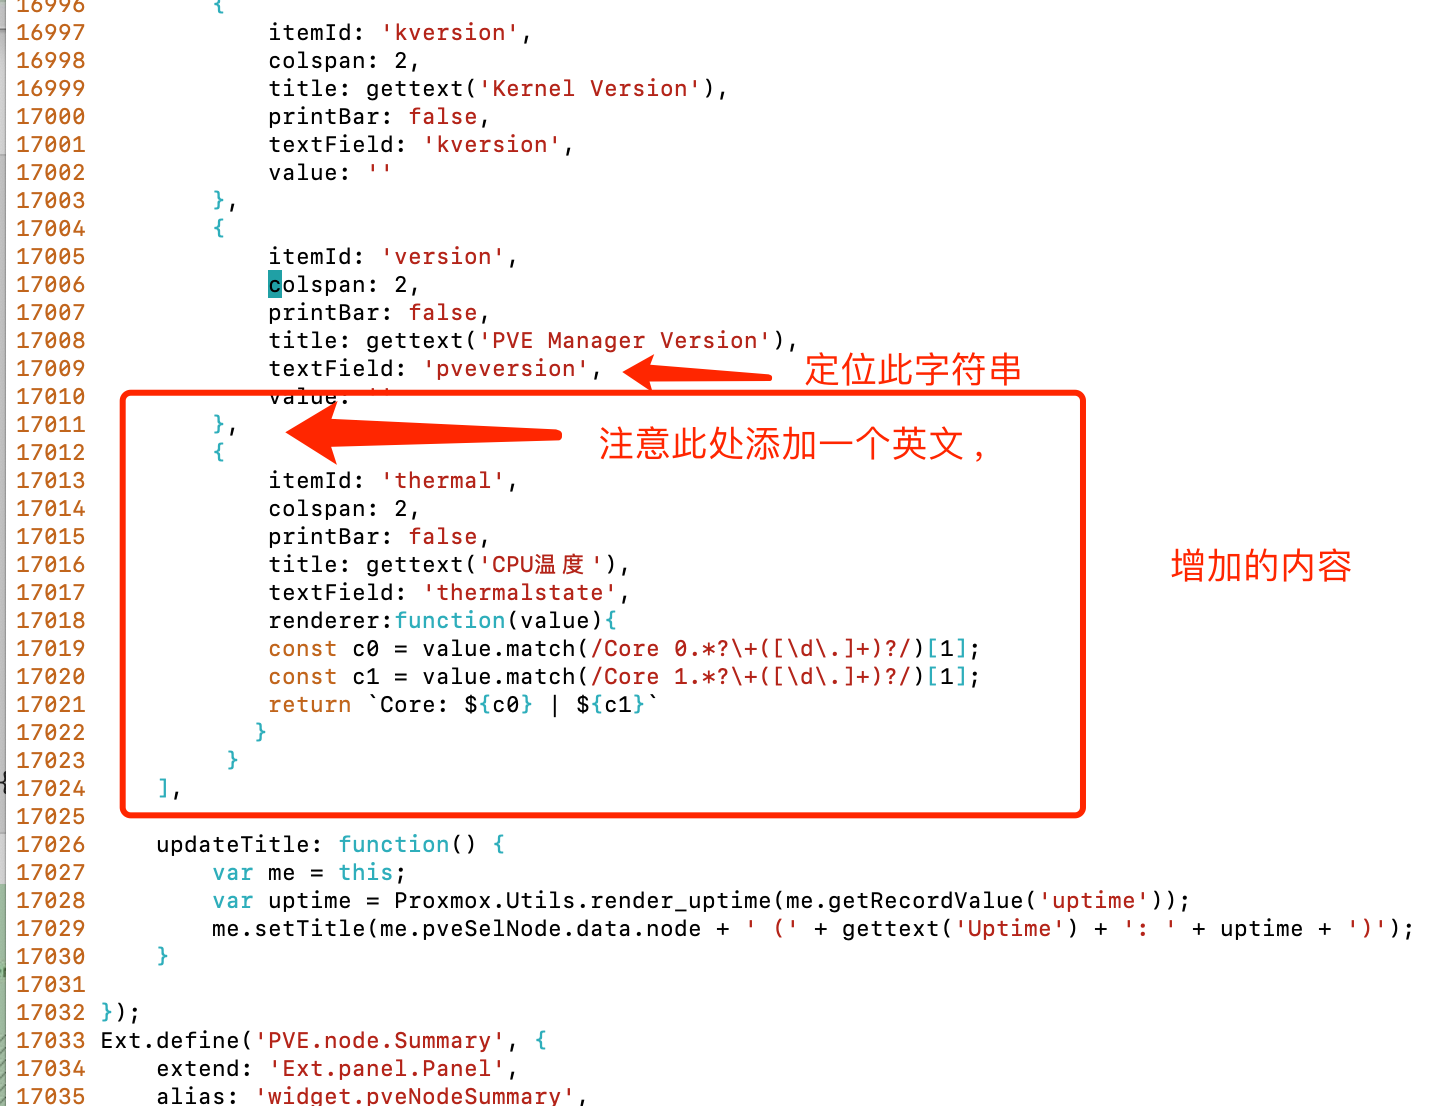 ## 3. 修改完成后,重启PVE的Web管理器 ```shell systemctl restart pveproxy ``` 之后强制刷新页面即可显示,win下:Ctrl + F5,Mac下:花键 + shift + R 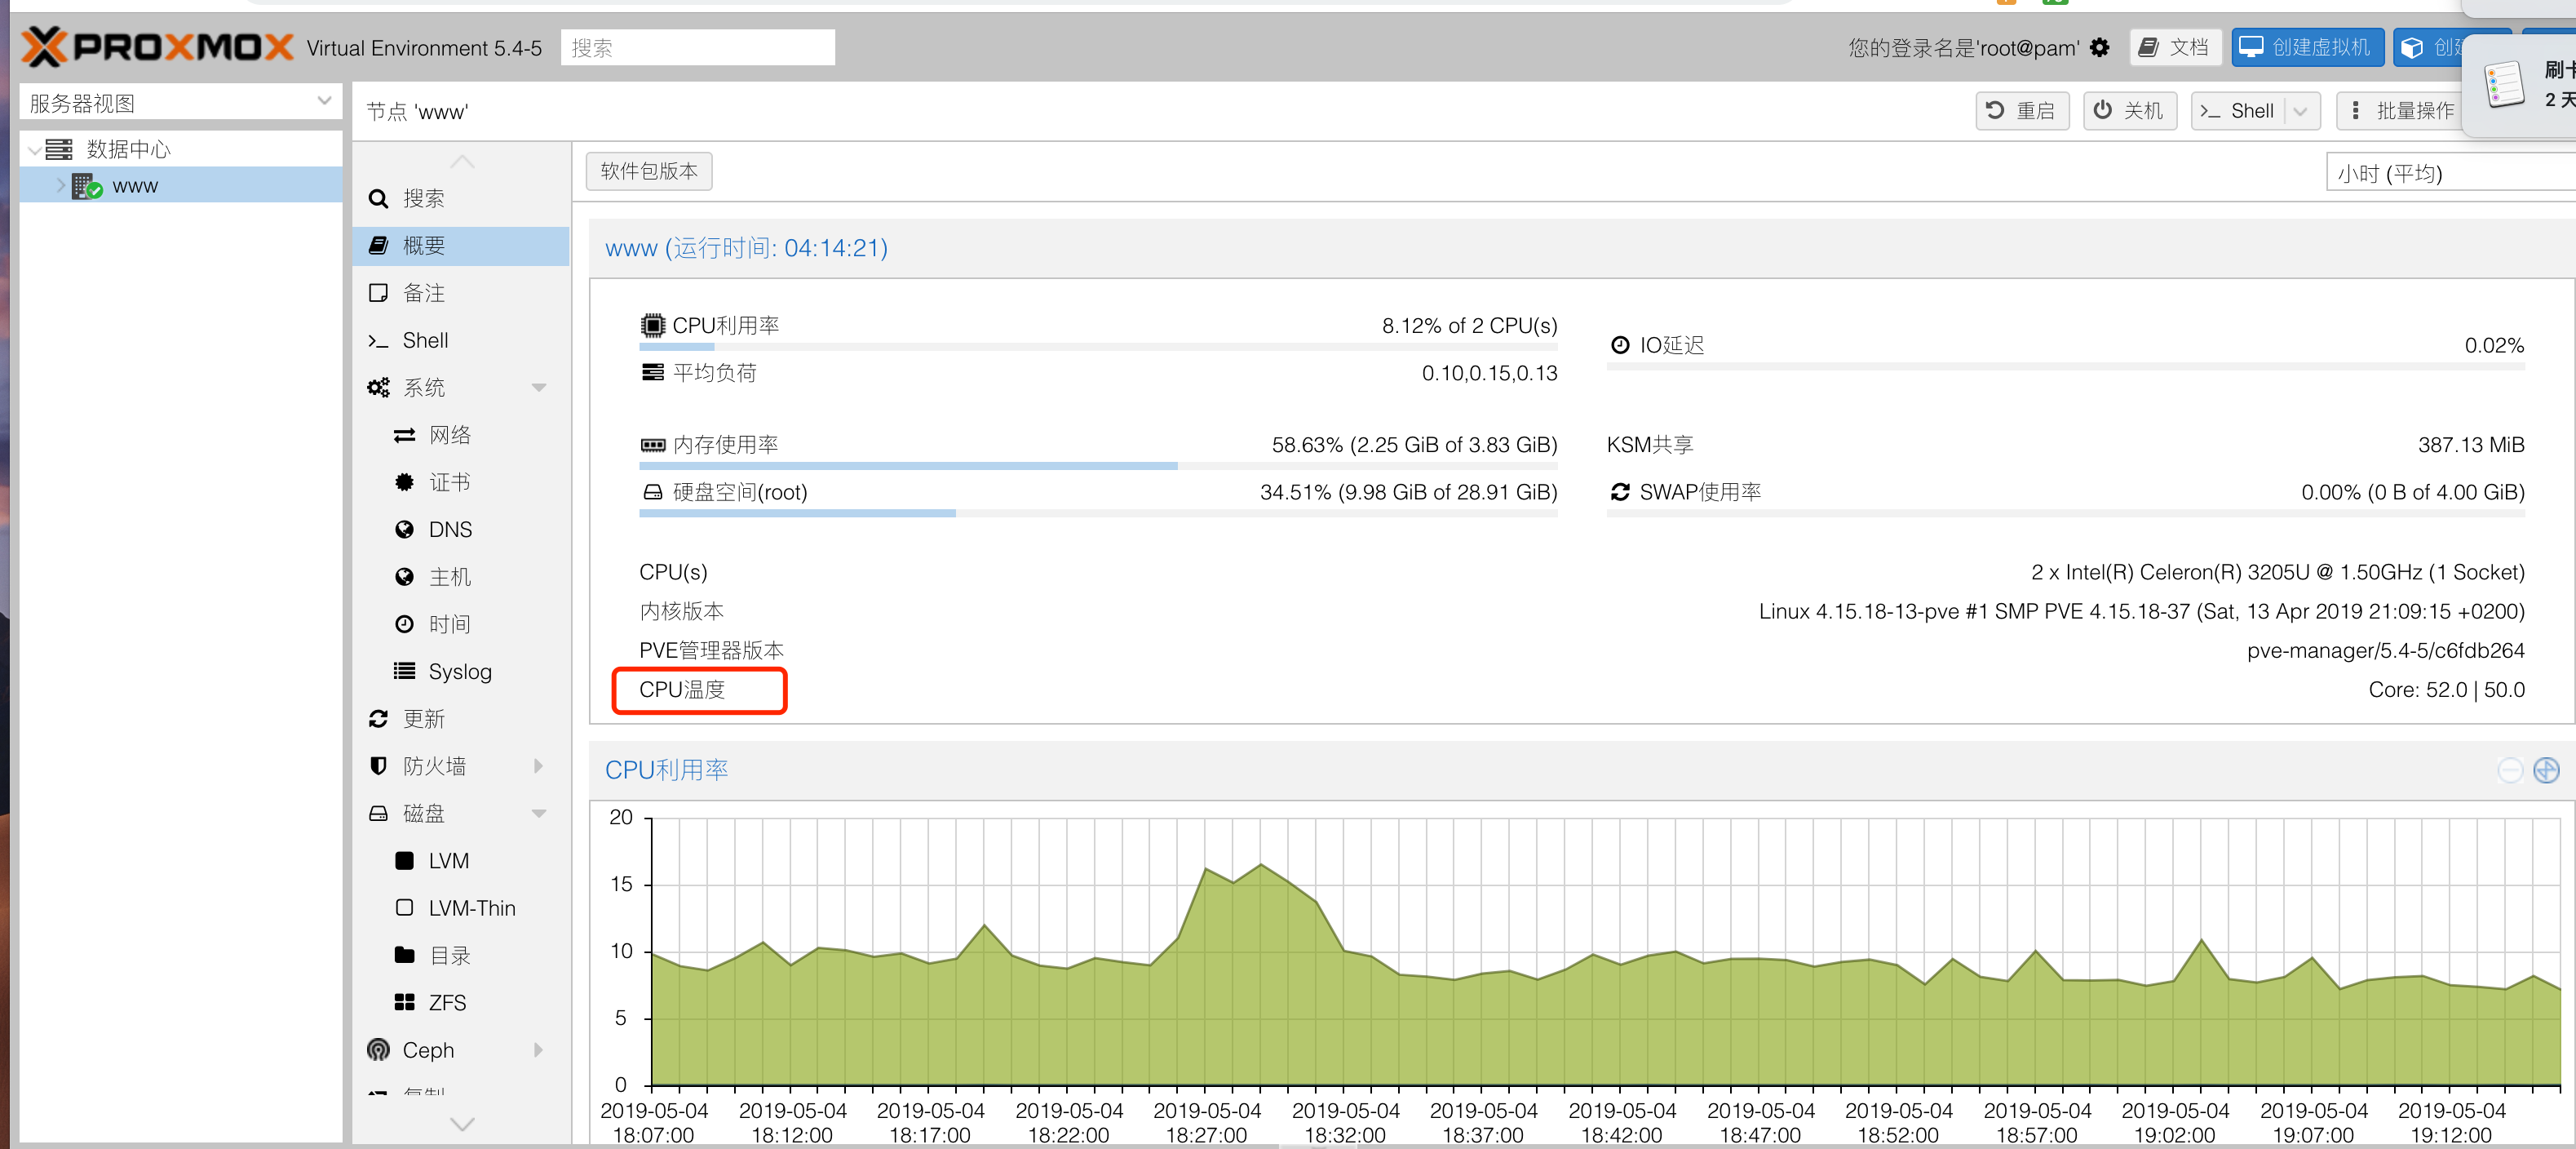
上一篇:
超线程,一个核同时执行两个线程(简单明了)
下一篇:
PVE直通硬盘